Tuesday, May 12, 2015

Imperial Assault Nexu figure

My masters program is finally wrapping up so you can expect a future post to highlight my project for this year.  As a result of that, though, I have been falling behind on side projects.  Today I am bringing you something I did a couple of weeks back but never posted.  This is the Nexu figure in my Imperial Assault game (from the arena scene in Star Wars II).  I knew it would be a challenge because of its stripes and fur but I decided it was a challenge worth taking.  I started with a base coat of khaki, similar to the color pattern in the movie.  Plowing ahead with the details, I mixed red and white to get the meaty color for his tail and mouth, mixing in some gloss red for a wet saliva look on his tongue.  Then I  mixed a sick cream color for the claws and teeth and finished with dark red for the eyes (all four).  Using what was called flat tan (much too green in reality) I began mixing the different fur tones.  A darker shade was used for the long spine tufts which was then low lighted and high lighted with various tones.  The striped pattern was accomplished with a bit of experimentation.  Holding a detail brush and a short bristle blending brush like chopsticks I alternated between painting a solid stripe and smudging it with the surrounding color to fade it with the other fur.  I continued like this until there were several non-distinct stripes, I then went back and repeated the process with smaller stripes inside the original stripes followed by less blending to make s stripe that fades out from dark to light.  The result was better than I would have thought and I am very pleased with it, definitely a centerpiece to my figure collection so far.  I have painted several more figures since this one but haven't documented any of them.  Look for more figures coming soon


Monday, April 6, 2015

Star Wars Imperial Assault miniatures

I recently bought the board game Star Wars Imperial Assault which came out in January of this year.  I was really looking forward to getting it for three reasons: A) I'm a huge Star Wars fan, B) it looks like a fantastically fun game (and after playing it I can say it is endless fun), C) there were dozens of miniatures to paint.  I had done some game miniature painting before for a Life game and Risk 2210 but this was a very ambitious endeavor.  For starters there are lots of them and I had to paint them all, unlike Risk 2210 where I only painted the commanders (and that was just touching up details).  Secondly, there are organic figures like Nexu and a Wookie with fur and shading, not easy at this size.  Undaunted I dove right in.  I had read that these figures took the paint better if they are primed so I followed the advice not wanting to risk messing up.  Another trick I picked up is to use putty to hold the figure to a bottle cap which gives you a nice grip to hold the figure without risking a wet paint job.  You can also put the cap on a partially filled water bottle and it becomes a stand for spraying and steadying the figure.

My first project was a set of three storm troopers, chosen because of the relative simplicity.  First I primed them then painted them an over-all white, then picked out the black joints and details.  Because it is necessary to differentiate between units in the game I added red unit markings to the pauldrons, the next units will likely be blue and green.  Of course one of the troopers is painted differently to be the unit commander.

So far I am impressed with the detail and quality of the Imperial Assault miniatures and I look forward to painting the rest of them soon, especially the massive AT-ST model!
 Here is the storm trooper in four stages of completion: out-of-the-box, primed, white, and finished.

 A finished storm trooper front and back still tacked to the bottle cap base.  The figures base has not been finished here and will probably be metal deck plating or something similar.

The finished trooper group and a pair of Imperial guards in full red regalia.  I hit them all with a top coat of matte clear to dim down the gloss paint and protect them from constant handling.

Wednesday, January 28, 2015

Haiti disaster relief shelter

This is a bit of a throw back.  During my senior year we did a two week mini-project where we had to design disaster relief housing for the Haiti earthquake that could be applied to future situations.  This was my final board which was well received by our guest critiquers who were long-term volunteers in Haiti.


Friday, January 16, 2015

Simple, small scale shooting techniques

It has been a while since I have posted anything so I decided to get back into things by posting something I wrote for a publication recently.
(Update: this article was featured in the March 2015 issue of Fine Scale Modeler magazine)

A lot of good models can be poorly represented by bad photographs. The wonderful thing is, models are actually rather easy to photograph with only a few simple steps. First off is setting. Stand alone models need an uncluttered back ground so that here will be no distractions for the viewer. In this example I ironed a pillow case (to remove creases) and draped it in a chair for a continuous floor-wall back drop. Second is lighting. Direct light flattens a subject so avoid built in flash. Natural sunlight is a great, free source of light but direct sunlight casts severe shadows. Shooting under solid shade or on a slightly overcast day gives great results. For shooting inside, overhead ceiling light are almost always insufficient. Try using a desk lamp for direct light. In the example photographs I used white cardboard to bounce the lamp light onto the opposite side of the model to soften shadows and evenly light the car. The third step is camera settings, this is where most amateur photographers get tripped up. First off, make sure the picture quality is set to the highest possible setting for best results. Next check the white balance, using the wrong setting here will completely change the color of your model. Auto white balance will usually work but manually setting the camera ensures success. Finally, we come to the trifecta of digital photography: ISO, aperture, and shutter speed. Simply put, ISO should always be set as low as possible (100 is best), a high ISO number will result in grainy photographs as the camera tries to compensate for low light conditions. Aperture and shutter speed are a balancing act, as one goes up the other should go down to maintain a perfect exposure, these you can play with to alter your results. Aperture determines how wide the hole is that lets light into the camera. A small f-stop (like F4.5) will let in a lot of light but result in a shallow depth of field (like in photograph A, part is in focus, part is blurry). This is great to highlight a particular detail of a model or diorama but does not represent the whole composition; for that a large f-stop (like F29) is used (like in photograph B, where the whole car is in focus). The problem with that is a large f-stop lets in very little light, so you need to make a long exposure to get a bright enough photograph. To make picture B I used an f-stop of F29 and a shutter speed of 10 seconds. That is far to long to hold the camera by hand so I used a tri-pod. When shooting with settings like these it is best to use the self timer to avoid shaking the camera when you press the shutter button. The best news,though, is you don't have to have a DSLR to get great results; I often use a Nikon point-and-click camera to photograph my models. As long as you set up your scene and camera properly you can make stunning photographs of your models to share however you like.


Photograph A settings: ISO 100, f/ 4.5, shutter 1/4s

Photograph B settings: ISO 100, f/ 29, shutter 10.0s

A professional setup is not required, I shot the above images with the lighting studio you see here.  Just a lamp, a pillow case and a white cardboard reflector.  So get out there and start shooting!

Saturday, October 11, 2014

BMW project pics

Not long ago I posted the final pictures of the wrecked BMW model.  I was downloading pictures off of a camera and found some photographs from the process and decided to share them.  Look out for more projects to be posted soon.

 To get the effect of shattered auto glass I took an X-Acto knife and slashed the inside into a fractal pattern.  Then I lightly sanded the outside with rough grit sandpaper to cap off the effect.
 The windshield would not fit into the cock-eyed frame anymore so instead I took a Dremel tool with a grinding attachment.  The effect worked better than I thought it would.  Here you can also see the rubbed paint effect.
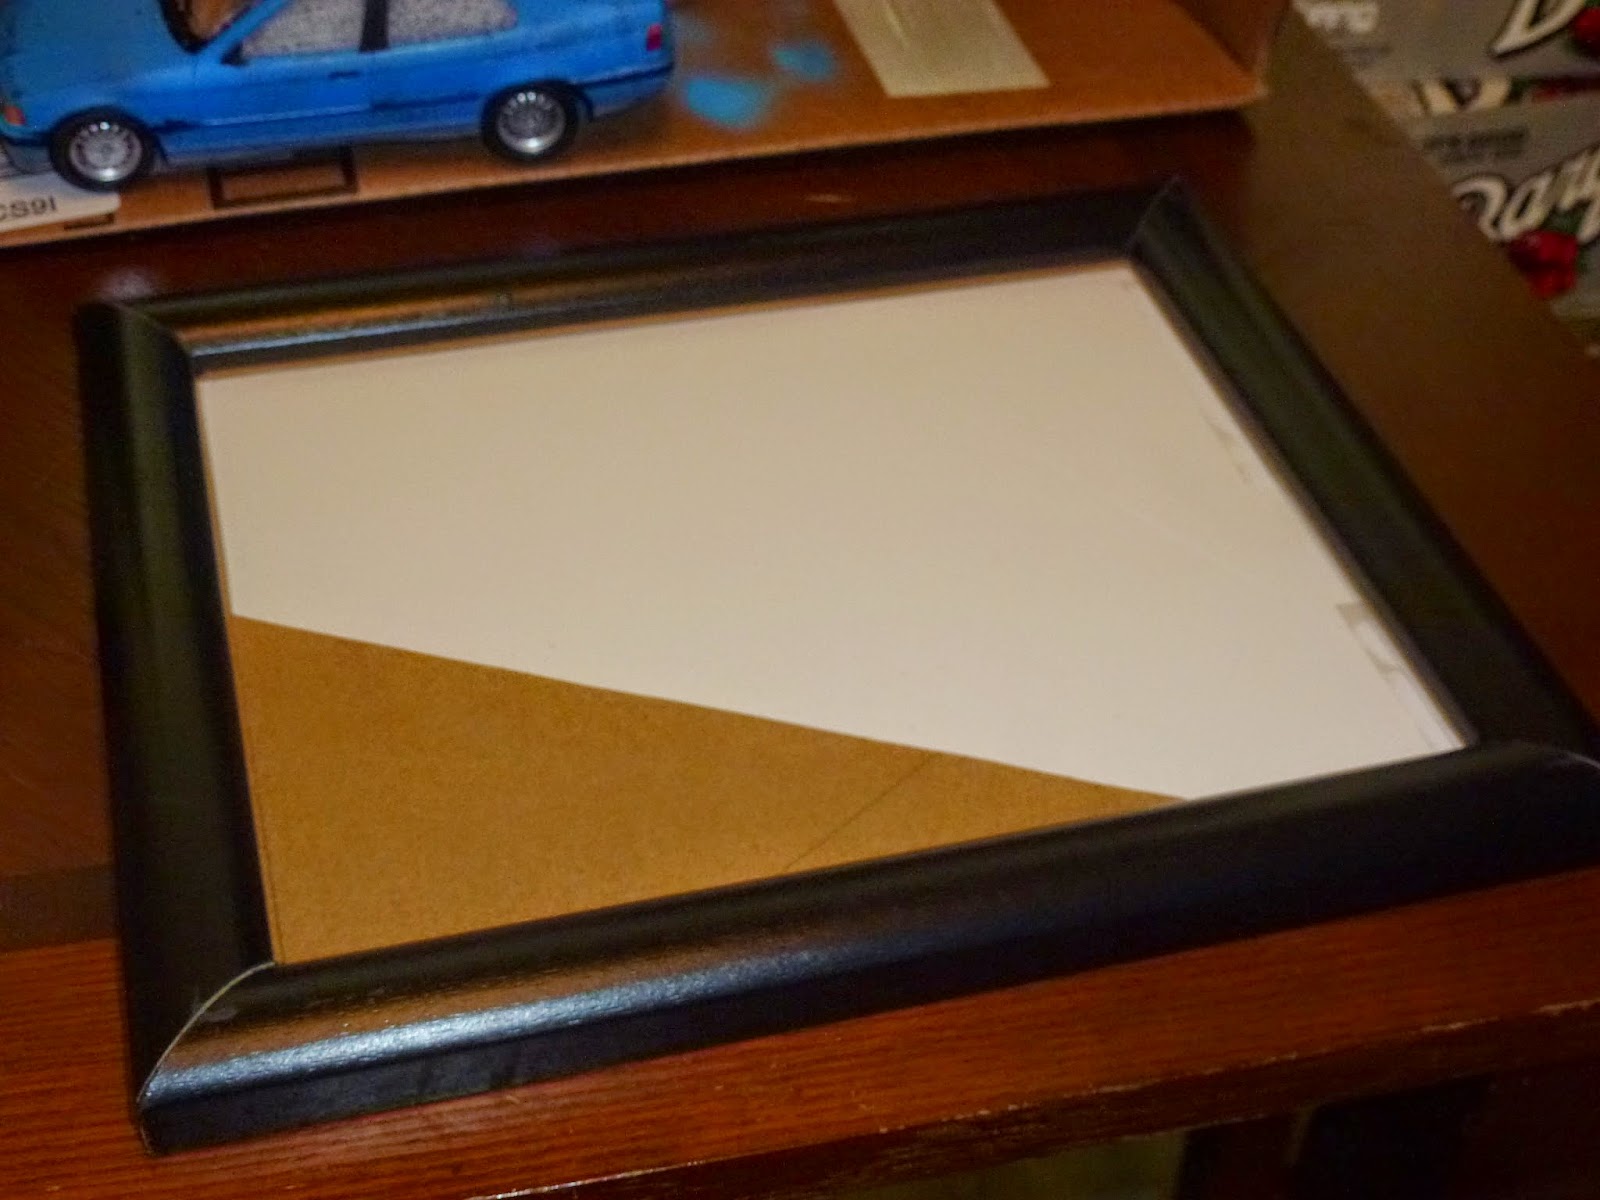
 To make the base I used foam core board cut to fit into the picture frame then cut cardboard to elevate the asphalt portion.  A band of cardboard was left just under the frame to keep a good fit.
 I got the picture frame from Goodwill for 99 cents and used it as is.
 I spread Elmers glue over the grass area and shook Woodland Scenics blended turf onto the glue.  After that dried I airbrushed the bare spots brown then shaded the grass with varying shades of green.
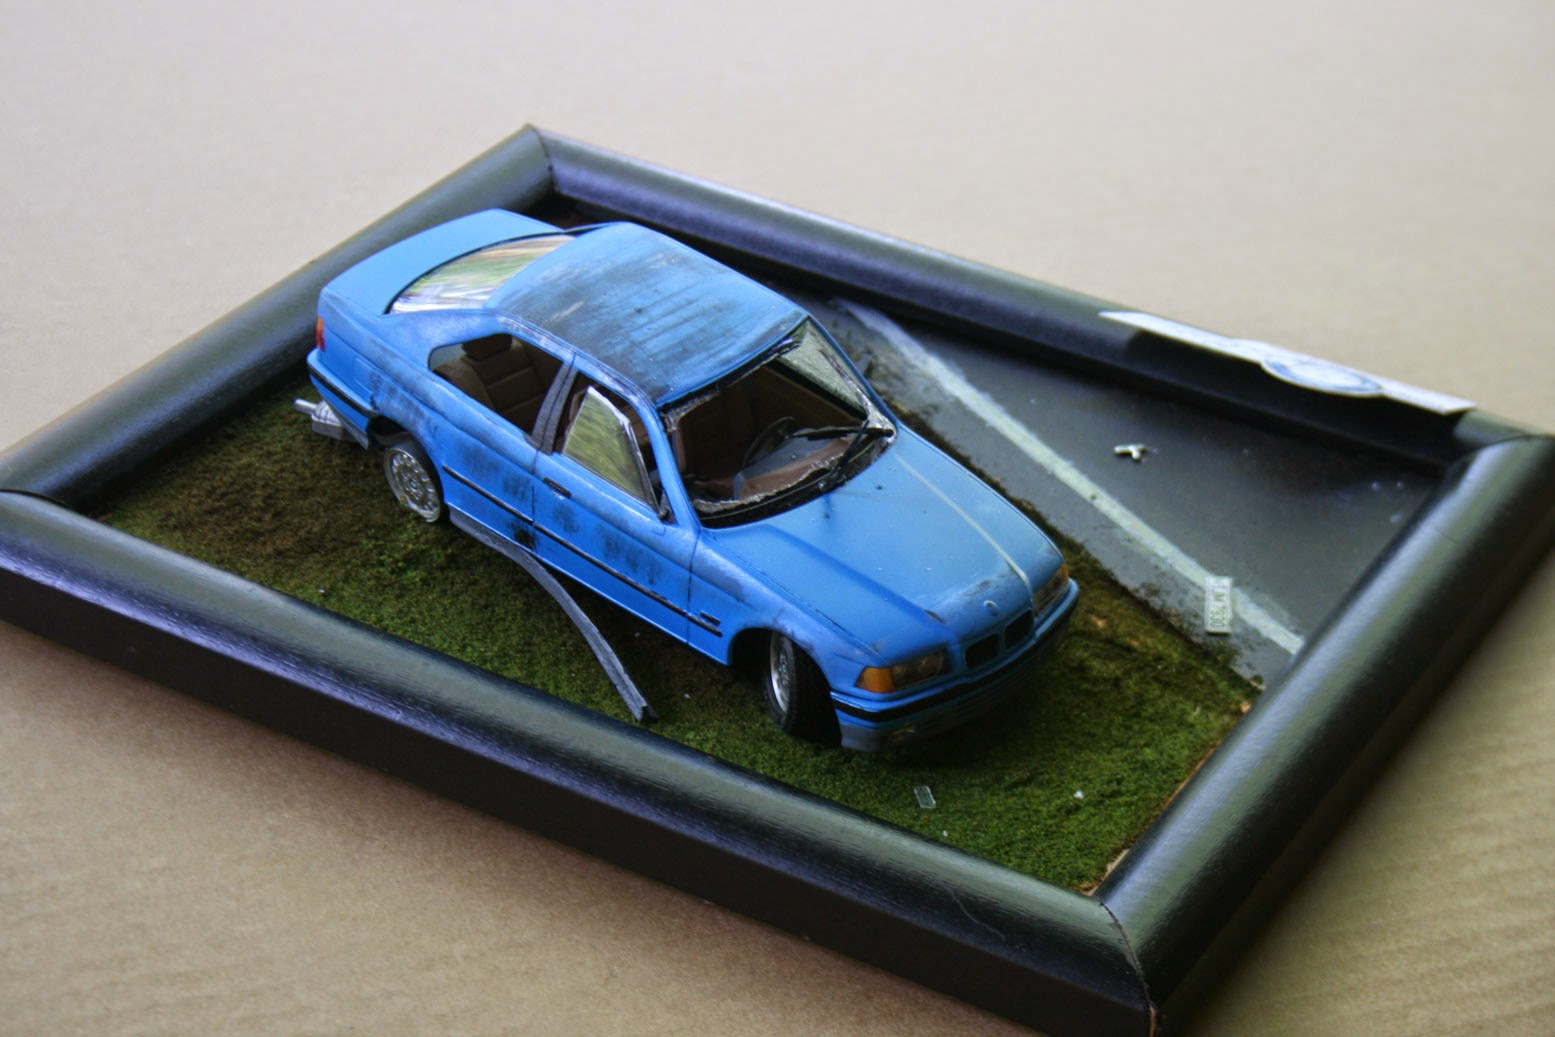
The finished display base waiting for a car.  The asphalt for the road was made in a similar manner as the grass except I used sand instead.  It was then painted black with a simple white stripe.  In order to secure the car to the base I punched two holes in the foam core and ran a twist tie over the axle then through the holes.  And there is a simple way to make a great display base for your next car model.

Tuesday, August 19, 2014

Finished map

It has been a while but I had posted a couple of times about a map I had been drawing about some fictional location.  I have only uploaded a few teaser photos so far but the project is done (except for maybe a few touch-ups).  I drew most all of the lines freehand and then scanned it into the computer.  There I used Photoshop to copy some trees and hills around to fill in some empty spaces.
 Next up I added color to the ocean and land masses, this happened on two separate layers.
 Next came the shading of individual portions of geography.  Each of the different types of trees got its own shade of green and I shaded the mountains grey as well as tan deserts/fields.  Rivers got a blue treatment as well but the lakes received a shading effect to simulate depth change.  This all happened on the same layer; the ocean and grass has changed shade because of a 50% transparency layer above them.
 Next I added city and geography names.  Because I didn't want to spend a lot of time coming up with lame names I got online and looked up Welsh, Irish, Gaelic, Icelandic, and Greenlandic names for the five areas (notice the border drawn on the largest island).  Because they are real names and words I know the translation of them all and placed them accordingly, like Fionghuala being the name of the massive glacier to the north because it is Gaelic for white shoulder.  To keep this all straight and to make organizing easier I made a folder for each family of languages.  I also placed dots for each city at this stage.
 Finally I put an image of faded paper over the whole thing at 50% to create the old map feel as well as blend all of the shading together.  Sure it is a somewhat pointless project and it took a lot of time but I had fun drawing and inking it and it was a good exercise in different techniques.

Monday, August 18, 2014

Wrecked BMW model

Not too long ago I bought a box of model cars off of Ebay for about $4 apiece.  Most of the kits are in good shape with two still in the shrink wrap but one of them was this BMW sedan.  Apparently the box had been under something heavy because the roof was smashed over.  I thought it looked like a car that had rolled over and decided to build it as if it had indeed crashed.  This was a good chance to do a fun and carefree build and to experiment with some weathering techniques.  I first over-sprayed it with a black base coat, then a layer of hairspray, then the blue top coat.  I then used a wet cotton swab to rub the top coat down to the hairspray which revealed the base coat as if the paint had been scraped off by the pavement.  I used a Dremel tool to cut the windshield out which also rough it up like it had been shattered, dust from this was then sprinkled over a little hairspray on the hood and dash like glass pieces.  The bent side trim was an experiment, I cut the piece off and boiled it for a quick moment; when I pulled it out I held it in a twist until it cooled and hardened like this.  There are lots of other little tidbits here and there that make for a believable scene.  I am a big fan of the British Top Gear and the road is roughly based on Gambon Corner so I printed out the small plaque.  This is my first display base in a while and it was a fun project.