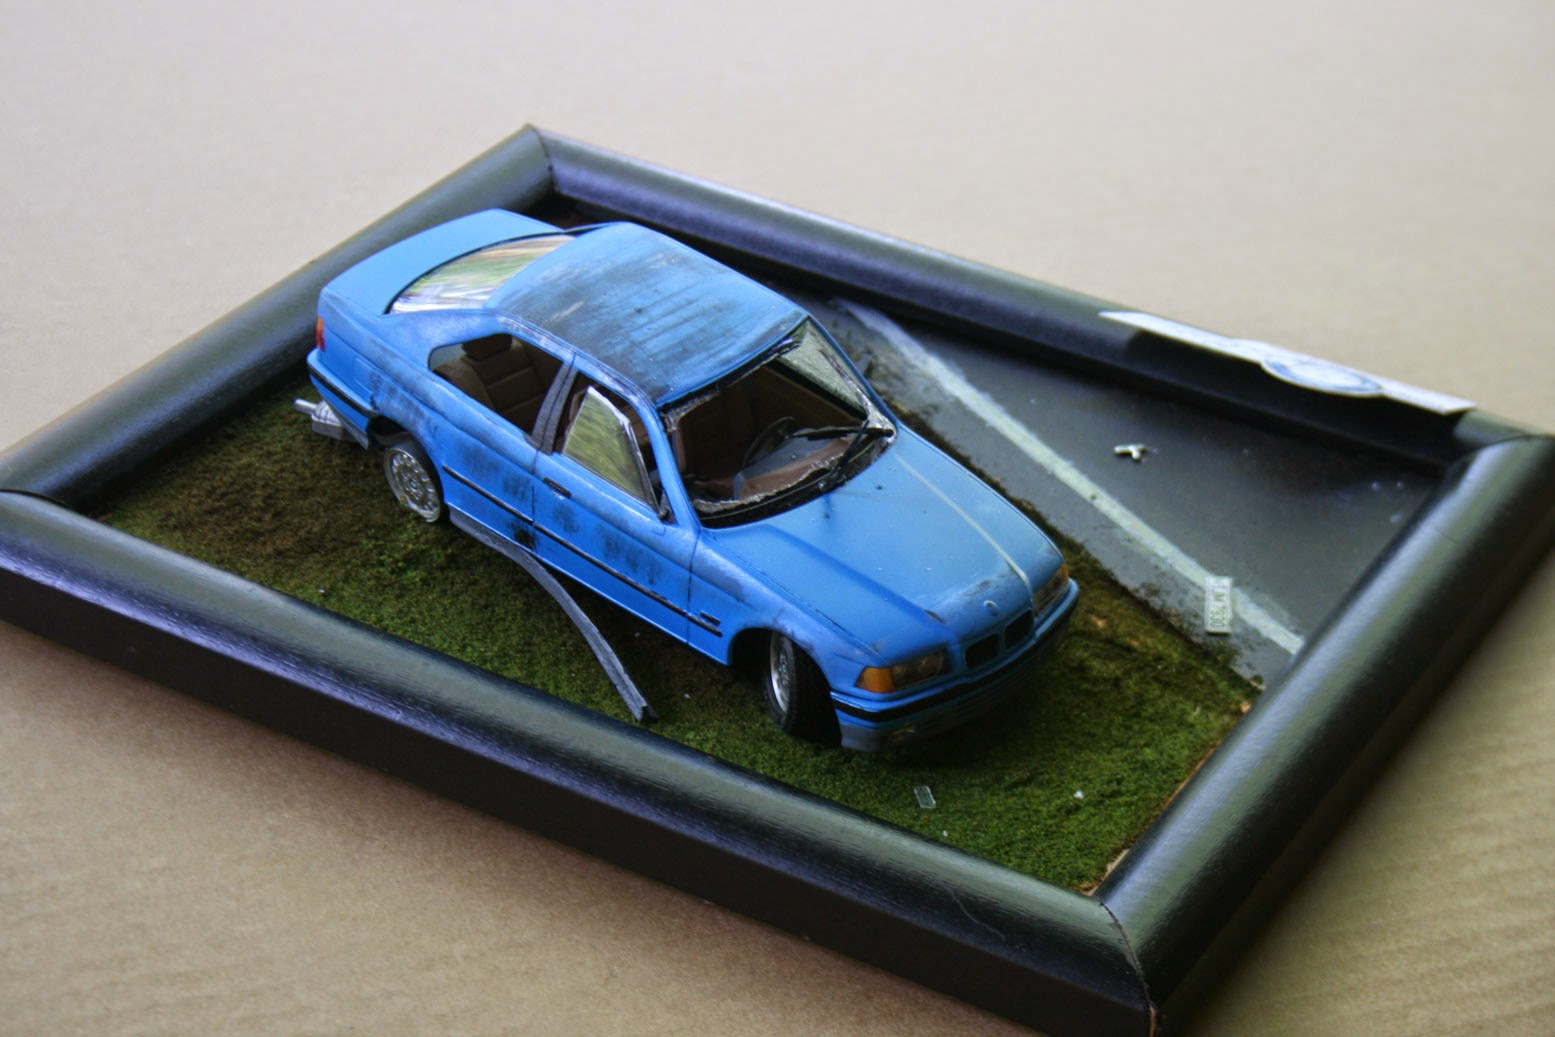
Not too long ago I bought a box of model cars off of Ebay for about $4 apiece. Most of the kits are in good shape with two still in the shrink wrap but one of them was this BMW sedan. Apparently the box had been under something heavy because the roof was smashed over. I thought it looked like a car that had rolled over and decided to build it as if it had indeed crashed. This was a good chance to do a fun and carefree build and to experiment with some weathering techniques. I first over-sprayed it with a black base coat, then a layer of hairspray, then the blue top coat. I then used a wet cotton swab to rub the top coat down to the hairspray which revealed the base coat as if the paint had been scraped off by the pavement. I used a Dremel tool to cut the windshield out which also rough it up like it had been shattered, dust from this was then sprinkled over a little hairspray on the hood and dash like glass pieces. The bent side trim was an experiment, I cut the piece off and boiled it for a quick moment; when I pulled it out I held it in a twist until it cooled and hardened like this. There are lots of other little tidbits here and there that make for a believable scene. I am a big fan of the British Top Gear and the road is roughly based on Gambon Corner so I printed out the small plaque. This is my first display base in a while and it was a fun project.
Monday, August 18, 2014
Saturday, August 9, 2014
Finished Horten
The Horten has finally been completed. I have actually been done for a while but I finished right when summer got busy and I have been very distracted since. All the decals are on and the base looks good. Four of the decals were locators for fuel fillers so I used some of my old, nasty paint thinner to make fuel stains. Somewhere in the process the radio areal flew from my tweezers and disappeared so I ended up replacing it with bent wire, it looks much better anyway. As a final touch I took my airbrush and sprayed on some exhaust stains. Here are the final pics.
Friday, May 9, 2014
Senior design project
Since I am devoting so much of my time to finishing my architecture project for school I decided to get double mileage out of one of my renderings and put it on here. This is my senior design project, a 1,000 seat church in downtown Charlotte North Carolina. I decided to ditch my usual realistic rendering style and went for a hipster-style abstract rendering instead. This project is for a national steel design competition.
Thursday, May 8, 2014
Return to the Horten
Hi again, congrats to all the graduates out there. I still have 2 weeks left till I get my diploma and I am excited. Although I am swamped with final exams and projects I still found time to pull the Horten flying wing back out. Since my last post about the Horten I decided to try pre-shading the model. This is an easy technique where all of the panel lines and joints are sprayed black before the top coat goes on. While spraying on the top coat the dark lines are tempered down but still show through. This not only gives depth to the paint job but also makes it more dynamic. Since I din't take process pictures I won't give a full tutorial on pre-shading but there are dozens of good ones online.
Once pre-shading was finished I mixed a German aviation blue by guesswork, it turned out pretty good, and sprayed the lower fuselage. I then mixed a suitable grey to over-spray the fuselage top.
Once all of the elements were glued together I masked off the camoflage pattern following the drawing on the box. Once again the internet provided a mix formula for a late war Luftwaffe camouflage green (R-5, G-5, B-3) and it was sprayed on. It looked too red until the tape came off but with the whole ensemble the result was great.
I am in the process of decaling it right now (and there are tons of decals, 53 on the exterior) and so far the decals are a disappointment. They don't adhere well and the clear surround glistens in the light. If you have the money and incentive swing for an aftermarket decal set, I wish I had. Since I decided to build the plane with the gear up I took a moment to build a display base which consisted of a piece of scavenged wood that I cut into an octagonal shape and some wire. I debated the swastika for a while but in the end I went for it. This model is progressing quickly so keep an eye open for a final installment soon.
Once pre-shading was finished I mixed a German aviation blue by guesswork, it turned out pretty good, and sprayed the lower fuselage. I then mixed a suitable grey to over-spray the fuselage top.
Once all of the elements were glued together I masked off the camoflage pattern following the drawing on the box. Once again the internet provided a mix formula for a late war Luftwaffe camouflage green (R-5, G-5, B-3) and it was sprayed on. It looked too red until the tape came off but with the whole ensemble the result was great.
I am in the process of decaling it right now (and there are tons of decals, 53 on the exterior) and so far the decals are a disappointment. They don't adhere well and the clear surround glistens in the light. If you have the money and incentive swing for an aftermarket decal set, I wish I had. Since I decided to build the plane with the gear up I took a moment to build a display base which consisted of a piece of scavenged wood that I cut into an octagonal shape and some wire. I debated the swastika for a while but in the end I went for it. This model is progressing quickly so keep an eye open for a final installment soon.
Friday, April 25, 2014
Lotus 25 Coventry Climax
I see a trend of having trouble with the paint job on my formula 1 cars. Even though I got to a rough start with the exact color green for the Lotus I eventually got it sorted out and I am very happy with the result. This is actually the first time I cared this much about the exact tone of the body color.
On the whole this is a wonderful kit, the suspension is well detailed and strong enough to hold the cars body weight (and this is a great place to extol the virtues of scraping chrome plating off of parts before cementing them). The body fits together well and seems to be scaled properly (not that I measured). The engine has a few fitment problems, some of the parts don't line up right and there are large gaps in places. Also the complex dual 4-to-1 junctions in the exhaust pipes don't fit well either, there was some cutting to ensure they all matched up. The decals are sublime, some of the best I have worked with; that sounds familiar, oh yes, the Ferrari F2001, Tamiya must be doing something right. If you want to detail the engine be warned, there is a scaling issue with the engine and exhaust pipes. On the real car there is a gap and heat shield between them and according to reference photos the spark plug leads run into that gap. In the model the pipes and engine abut one another, not much room for wires, I made do but it doesn't technically work. Detailing is a great thing too, with all of the removable body panels it's not all wasted.
That brings me to point 3, I used to struggle to get good reference photos but I made a discovery. Visit http://www.ultimatecarpage.com/ there you will find photos and info on tons of cars. I went back and looked up the most obscure cars I have built and they had info on them, I was surprised, it is now book marked on my laptop.
On the whole this is a wonderful kit, the suspension is well detailed and strong enough to hold the cars body weight (and this is a great place to extol the virtues of scraping chrome plating off of parts before cementing them). The body fits together well and seems to be scaled properly (not that I measured). The engine has a few fitment problems, some of the parts don't line up right and there are large gaps in places. Also the complex dual 4-to-1 junctions in the exhaust pipes don't fit well either, there was some cutting to ensure they all matched up. The decals are sublime, some of the best I have worked with; that sounds familiar, oh yes, the Ferrari F2001, Tamiya must be doing something right. If you want to detail the engine be warned, there is a scaling issue with the engine and exhaust pipes. On the real car there is a gap and heat shield between them and according to reference photos the spark plug leads run into that gap. In the model the pipes and engine abut one another, not much room for wires, I made do but it doesn't technically work. Detailing is a great thing too, with all of the removable body panels it's not all wasted.
That brings me to point 3, I used to struggle to get good reference photos but I made a discovery. Visit http://www.ultimatecarpage.com/ there you will find photos and info on tons of cars. I went back and looked up the most obscure cars I have built and they had info on them, I was surprised, it is now book marked on my laptop.
Monday, April 7, 2014
Progress report on the Lotus
Progress report on the Lotus. The monocoque chassis has been assembled and the front suspension and most of the rear suspension has been as well. I finally got the paint mix right too, the internet came through once again. I found a formula for British racing green; R1 G60 B30 so I put 1 drop of red, 10 drops of blue and 20 drops of green in my airbrush and it went on perfectly. I am still having trouble getting a smooth finish out of my air brush but I'll keep practicing. The beauty of this model is it is very simple so it leaves lots of opportunities for modification. So far I have wrapped Kleenex around the radiator return pipe and painted it red for insulation; ran wires for front brake lines and gauge faces and added a reservoir bottle that wasn't included in the model. The chassis has been set aside for now and I will focus on building and detailing the engine. I have also discovered a wonderful resource at http://www.ultimatecarpage.com/ it has tons of pictures of lots of different cars. I looked up some of the most obscure cars I have ever built and found them there. It has been an invaluable resource on this project and I have bookmarked it for future use.
Tuesday, March 25, 2014
New day, new car
Well, after a long absence I am back with a new model. Fresh out of the box (shipped from Japan) is a Tamiya Lotus 25 Formula 1 car. This is the other bookend to my F1 car timeline, the Lotus started its racing career in 1962. In 1963, with Jim Clark at the wheel, the Lotus 25 won 7 of the 10 Grand Prix races. Of course, since it is a great British racing car I have to get the British racing green correct. So far this has been a trial and error process of mixing and re-mixing green, black and yellow as I have yet to find a mixing formula to help. This is where I am as of now, it looks too dark so another pass is needed. The pursuit of perfection.
Subscribe to:
Posts (Atom)