It has been a while but I had posted a couple of times about a map I had been drawing about some fictional location. I have only uploaded a few teaser photos so far but the project is done (except for maybe a few touch-ups). I drew most all of the lines freehand and then scanned it into the computer. There I used Photoshop to copy some trees and hills around to fill in some empty spaces.
Next up I added color to the ocean and land masses, this happened on two separate layers.
Next came the shading of individual portions of geography. Each of the different types of trees got its own shade of green and I shaded the mountains grey as well as tan deserts/fields. Rivers got a blue treatment as well but the lakes received a shading effect to simulate depth change. This all happened on the same layer; the ocean and grass has changed shade because of a 50% transparency layer above them.
Next I added city and geography names. Because I didn't want to spend a lot of time coming up with lame names I got online and looked up Welsh, Irish, Gaelic, Icelandic, and Greenlandic names for the five areas (notice the border drawn on the largest island). Because they are real names and words I know the translation of them all and placed them accordingly, like Fionghuala being the name of the massive glacier to the north because it is Gaelic for white shoulder. To keep this all straight and to make organizing easier I made a folder for each family of languages. I also placed dots for each city at this stage.
Finally I put an image of faded paper over the whole thing at 50% to create the old map feel as well as blend all of the shading together. Sure it is a somewhat pointless project and it took a lot of time but I had fun drawing and inking it and it was a good exercise in different techniques.
Tuesday, August 19, 2014
Monday, August 18, 2014
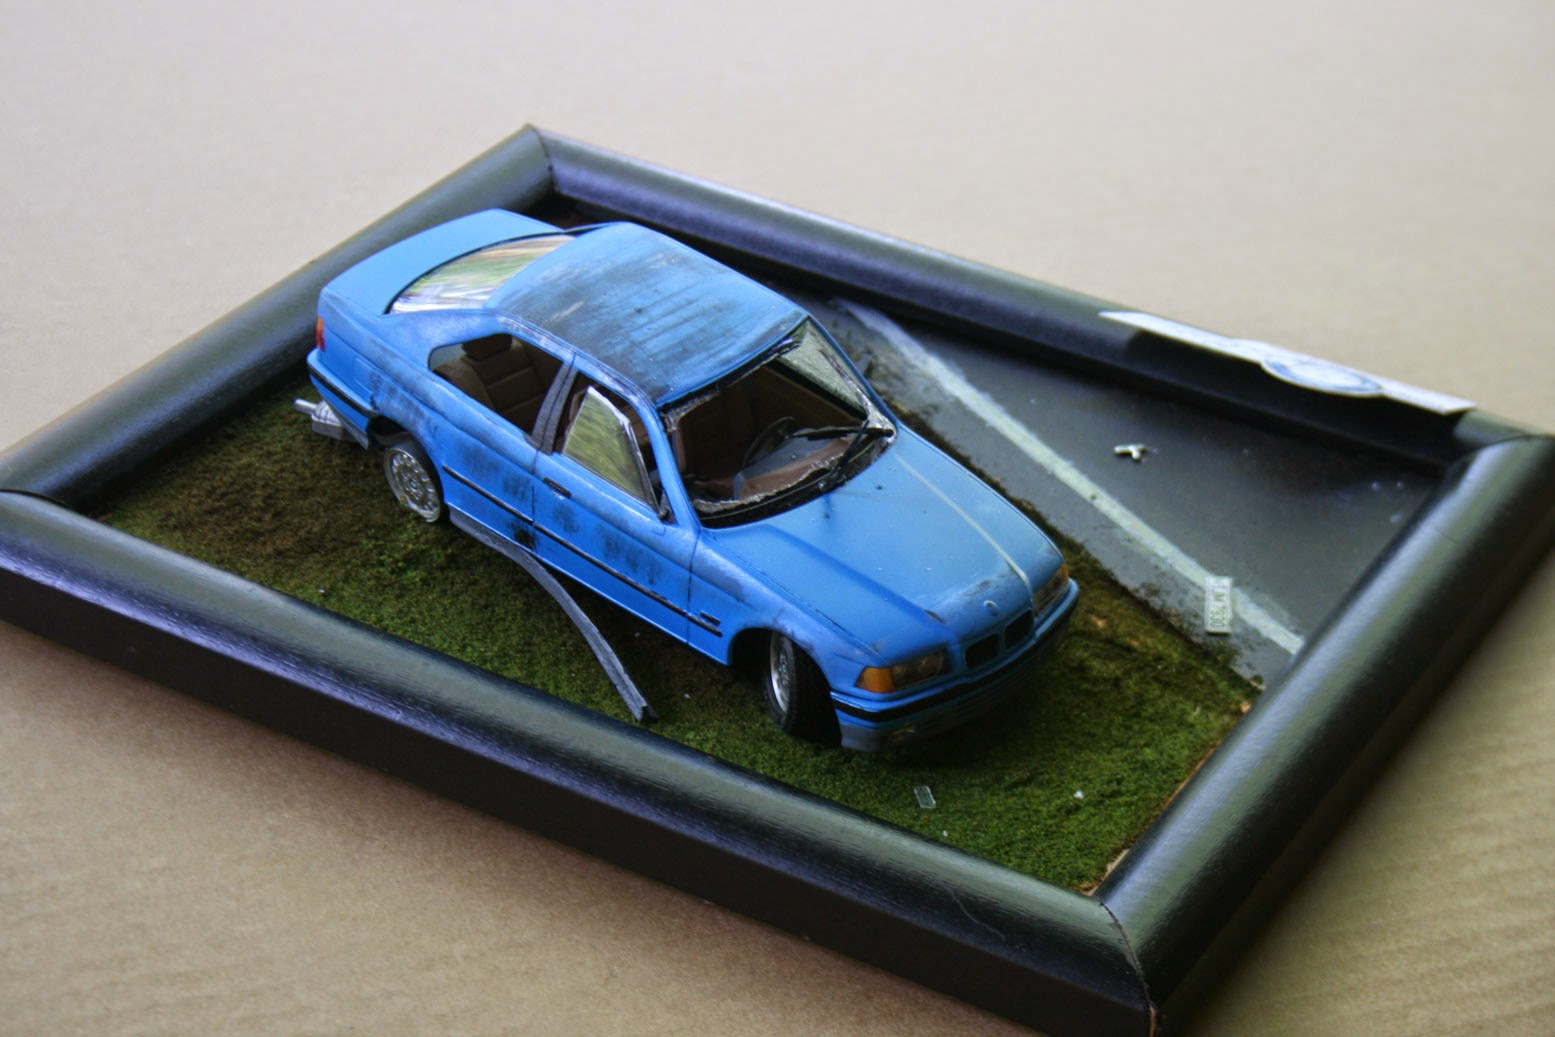
Wrecked BMW model
Not too long ago I bought a box of model cars off of Ebay for about $4 apiece. Most of the kits are in good shape with two still in the shrink wrap but one of them was this BMW sedan. Apparently the box had been under something heavy because the roof was smashed over. I thought it looked like a car that had rolled over and decided to build it as if it had indeed crashed. This was a good chance to do a fun and carefree build and to experiment with some weathering techniques. I first over-sprayed it with a black base coat, then a layer of hairspray, then the blue top coat. I then used a wet cotton swab to rub the top coat down to the hairspray which revealed the base coat as if the paint had been scraped off by the pavement. I used a Dremel tool to cut the windshield out which also rough it up like it had been shattered, dust from this was then sprinkled over a little hairspray on the hood and dash like glass pieces. The bent side trim was an experiment, I cut the piece off and boiled it for a quick moment; when I pulled it out I held it in a twist until it cooled and hardened like this. There are lots of other little tidbits here and there that make for a believable scene. I am a big fan of the British Top Gear and the road is roughly based on Gambon Corner so I printed out the small plaque. This is my first display base in a while and it was a fun project.
Saturday, August 9, 2014
Finished Horten
The Horten has finally been completed. I have actually been done for a while but I finished right when summer got busy and I have been very distracted since. All the decals are on and the base looks good. Four of the decals were locators for fuel fillers so I used some of my old, nasty paint thinner to make fuel stains. Somewhere in the process the radio areal flew from my tweezers and disappeared so I ended up replacing it with bent wire, it looks much better anyway. As a final touch I took my airbrush and sprayed on some exhaust stains. Here are the final pics.
Subscribe to:
Comments (Atom)


